Post by ~*Anno*~ on Jul 27, 2009 10:36:09 GMT -5
Hello everyone here's a simple tutorial on how to make a banner.
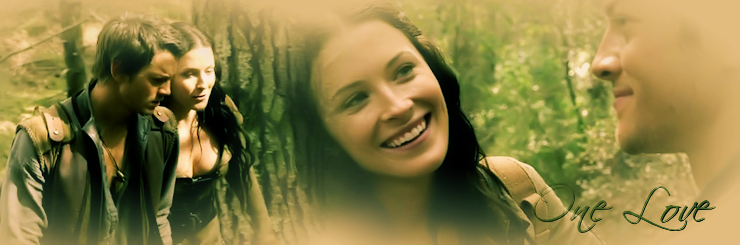
This is what we're going to make:

I've used Paint Shop Pro 12 for this tutorial
Here are the pictures I've used for this tutorial
img.photobucket.com/albums/v614/mrbump/charmedbannertutorial/8x00-promo-holly09.jpg
img.photobucket.com/albums/v614/mrbump/charmedbannertutorial/8x00-promo-rose03.jpg
img.photobucket.com/albums/v614/mrbump/charmedbannertutorial/8x00-promo-alyssa08.png
Lets begin
* First open Paint Shop
* Go to File and click on New (see image)

* Width: 500 Height: 150 (see image)

* This is what you'll have now

* Open Alyssa picture in Paint Shop
* Go to Image and click on Resize
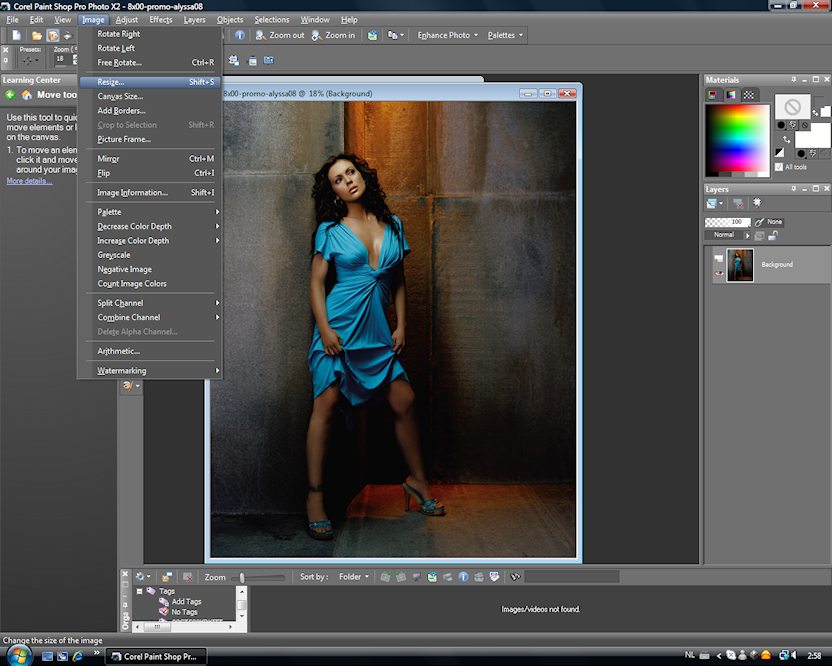
* Change size into 12% click OK (see image)

* Copy Alyssa picture

* Now go to your blank canvas, right mouse button. Paste - paste as New Layer

* Now get your move tool and move the picture in place
( you can click on the letter M on your keyboard to get the move tool)

* Now open Rose picture. Go to Image and click on Resize. Resize Rose picture into 40% (see image)

* Copy and Paste Rose picture onto you working canvas
* Move the Rose picture over the Alyssa picture (see image)

* Choose the eraser tool, size on 25 and now go carefully erase the left side of the Rose picture (see images) Be carefull not to erase her body


* Open Holly picture go to Image, click on Resize. Resize into 10% (see image)

* Copy and Paste Holly picture onto your working canvas. Move it in place using your move tool
* Grab your eraser tool again, erase a small part of the wall on the left side ( see image)

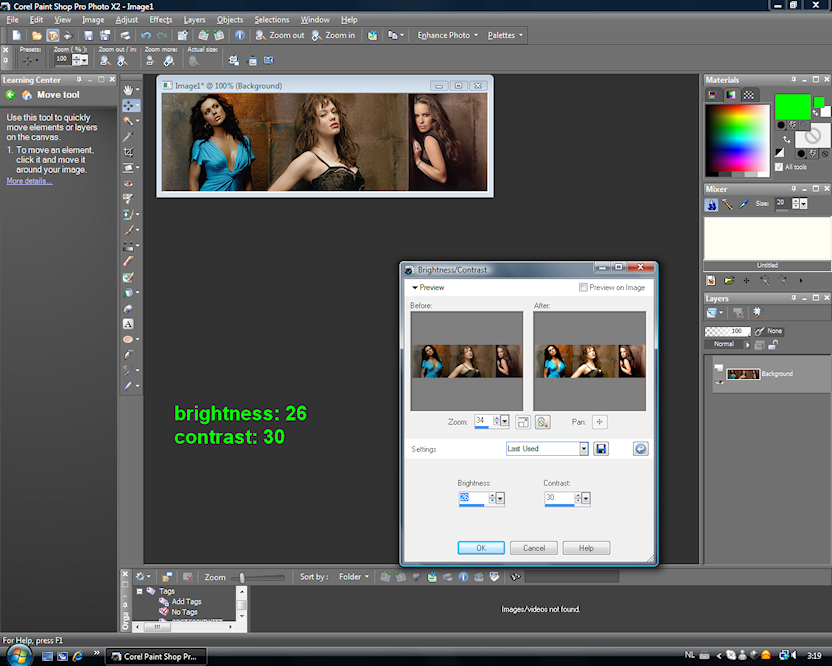
* Go to Layers > Merge > Merge All Flatten (see image)

* Go to Adjust > Brightness and Contrast > Brightness/Contrast (see image )

* Change Brightness and Contrast, click on OK when done
* Go to Adjust > Brightness and Contrast > Clarify

* Change Clarify, click OK when done

It's possible that the next few steps can't be make with older Paint Shop Pro programs. So if you can't do them you can skip them and continue on with the Text
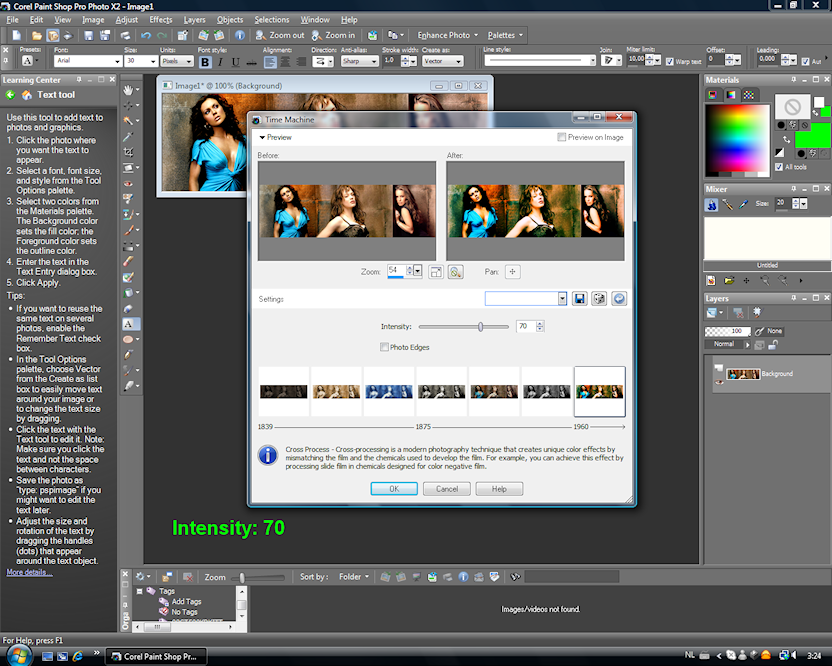
* Go to Effects > Photo Effects > Time Machine
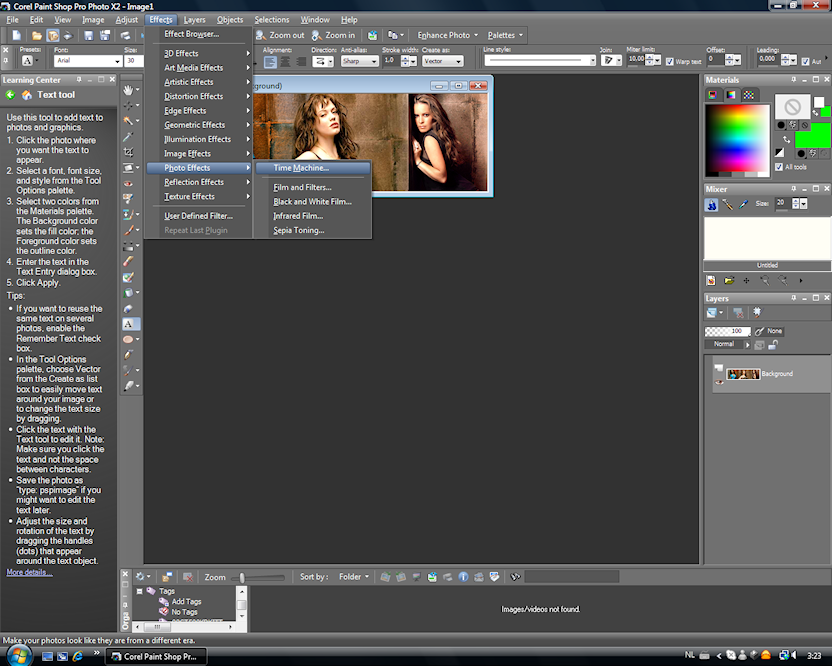
* I choose for "Cross Over" (see image) Intensity:70
* Click on the Letter tool and choose a nice font for your Text

* Click with your mouse on your working canvas, a small box will pop-up (see image)
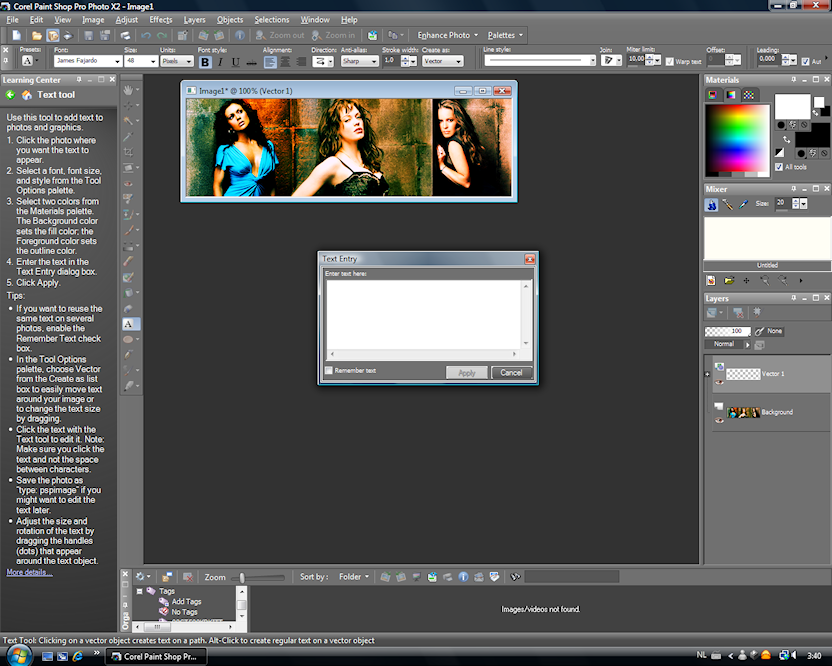
* Type your text in the small box. When your done click on Apply

* When you go to your text on your working canvas with your cursor, you'll notice it will change when you go to the center of the text (you can move it now, remember to hold the mouse button when move)
* Go to Layers > Convert to Raster Layer (see image)

* Go to Layers > Merge > Merge All Flatten

* Go to File > Save as ( you can save your banner here on your computer)

Thank you all for trying my "Charmed" banner tutorial.
* if there are some questions just send me a PM
This is what we're going to make:
I've used Paint Shop Pro 12 for this tutorial
Here are the pictures I've used for this tutorial
img.photobucket.com/albums/v614/mrbump/charmedbannertutorial/8x00-promo-holly09.jpg
img.photobucket.com/albums/v614/mrbump/charmedbannertutorial/8x00-promo-rose03.jpg
img.photobucket.com/albums/v614/mrbump/charmedbannertutorial/8x00-promo-alyssa08.png
Lets begin

* First open Paint Shop
* Go to File and click on New (see image)
* Width: 500 Height: 150 (see image)
* This is what you'll have now
* Open Alyssa picture in Paint Shop
* Go to Image and click on Resize
* Change size into 12% click OK (see image)
* Copy Alyssa picture
* Now go to your blank canvas, right mouse button. Paste - paste as New Layer
* Now get your move tool and move the picture in place
( you can click on the letter M on your keyboard to get the move tool)
* Now open Rose picture. Go to Image and click on Resize. Resize Rose picture into 40% (see image)
* Copy and Paste Rose picture onto you working canvas
* Move the Rose picture over the Alyssa picture (see image)
* Choose the eraser tool, size on 25 and now go carefully erase the left side of the Rose picture (see images) Be carefull not to erase her body
* Open Holly picture go to Image, click on Resize. Resize into 10% (see image)
* Copy and Paste Holly picture onto your working canvas. Move it in place using your move tool
* Grab your eraser tool again, erase a small part of the wall on the left side ( see image)
* Go to Layers > Merge > Merge All Flatten (see image)
* Go to Adjust > Brightness and Contrast > Brightness/Contrast (see image )
* Change Brightness and Contrast, click on OK when done
* Go to Adjust > Brightness and Contrast > Clarify
* Change Clarify, click OK when done
It's possible that the next few steps can't be make with older Paint Shop Pro programs. So if you can't do them you can skip them and continue on with the Text
* Go to Effects > Photo Effects > Time Machine
* I choose for "Cross Over" (see image) Intensity:70
* Click on the Letter tool and choose a nice font for your Text
* Click with your mouse on your working canvas, a small box will pop-up (see image)
* Type your text in the small box. When your done click on Apply
* When you go to your text on your working canvas with your cursor, you'll notice it will change when you go to the center of the text (you can move it now, remember to hold the mouse button when move)
* Go to Layers > Convert to Raster Layer (see image)
* Go to Layers > Merge > Merge All Flatten
* Go to File > Save as ( you can save your banner here on your computer)
Thank you all for trying my "Charmed" banner tutorial.
* if there are some questions just send me a PM